
Setting up a private weather station
Is it possible to make good weather observations at home without expensive professional observation instruments? Yes, it is. There are differences between instruments, but even the most expensive ones will not yield desired results if they are installed in the wrong place.
When you are setting up a private weather station, make sure to place the instruments correctly, so that you will obtain as useful weather observations as possible. The purpose of these instructions is to guide you to make decent weather observations. Firstly, we go through general issues related to choosing the location of the weather station. Then we discuss each measurable quantity – namely air temperature and humidity, wind speed and direction, atmospheric pressure, precipitation and snow depth – individually, as each of them is subject to specific requirements.
The representativeness requirements are based on Annex 8 (the CIMO guide) of the World Meteorological Organization (WMO). The purpose of representativeness is to make sure that observations made around the world are comparable, and that the conditions at local, smaller stations will not affect the observations. Finding the perfect observation spot can be almost impossible, but do not be discouraged; the important thing is to identify the potential error sources and find a suitable compromise.
Location of the weather station
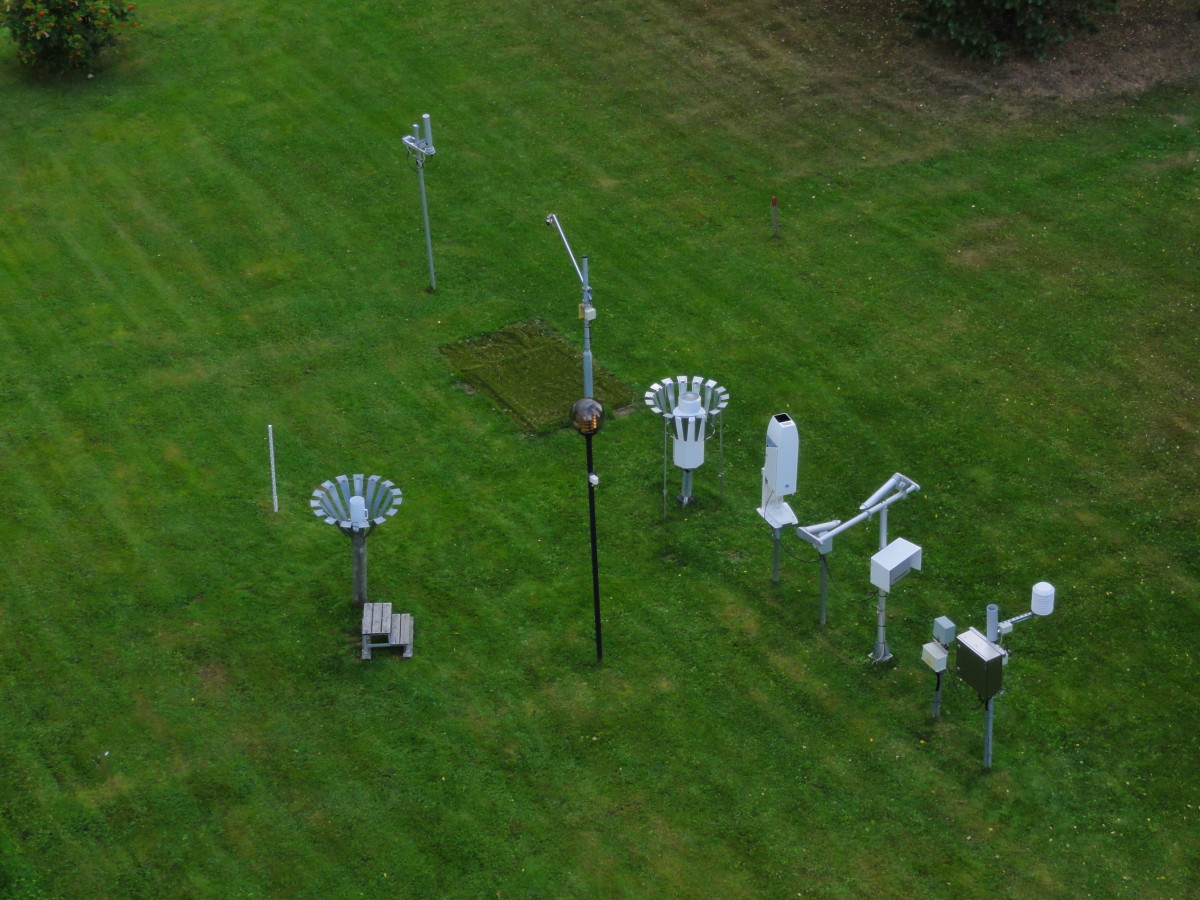
It is advisable to use some time to select the location of the weather station, so that the measured quantities will be meteorologically as representative as possible. Typically, a measuring point should represent an area of several square kilometres, but a private weather station can also represent the weather conditions in your very own yard. Ideally, a weather station is located on a well-maintained lawn area with an even surface. If the area is characterised by sandy zones, steep hillsides or dells, the weather station can also be placed in such a location, if necessary.
Moreover, the weather station should not be placed on rocks, asphalt or a cement platform, as these act as heat sources and, therefore, affect the measuring of the actual temperature. When choosing the place for your station, you should also pay attention to the location of trees, buildings and watercourses. For example, watercourses cause temperatures to rise in the fall and cool down in the summer.
There should be no trees or large buildings in the immediate vicinity of the observation site, as these affect the observation results. For example, a forest or a building may alter the direction and strength of winds and, as result, affect the accumulation of rain and snow. If, however, there are obstacles in the area, the distance to the weather station should be at least twice the height of the obstacle.
The instruments are usually situated close to each other, but it is possible to place, for example, the wind sensor– the anemometer – further away from the other instruments in order to obtain more representative results. If an ideal location cannot be found, the weather station can be placed in a location that serves as a compromise of all the above-mentioned criteria. It is also worth remembering that, in addition to the right location, the key to good observations is regular maintenance. The weather station should be placed so that the instruments are easy to access, and the station and its surroundings can be easily maintained. The minimum maintenance procedures should include keeping the instruments free of dust, debris and snow.
Air temperature and humidity
Air temperature is measured at a height of two meters. As a rule, the temperature sensor should be situated inside a radiation shield, but the shield must allow for ventilation and the mixing of air. The use of a radiation shield prevents the sensor from being exposed to direct sunlight and rain, thus preventing inaccurate results. If the use of a radiation shield is not possible, place the sensor in a shaded place. A good shady spot can often be found on the northern side of a building, for example. Make sure that the instruments remain out of the sun all day long.
However, the sensor should not be closer to an obstacle than twice the height of the obstacle. If the sensor must be placed right next to a building, make sure not to place it close to heat sources such as air vents. Other possible heat sources include asphalt, cement and brick pavement. The humidity sensor is usually placed together with the temperature sensor, or it should be placed in a similar location than the temperature sensor.
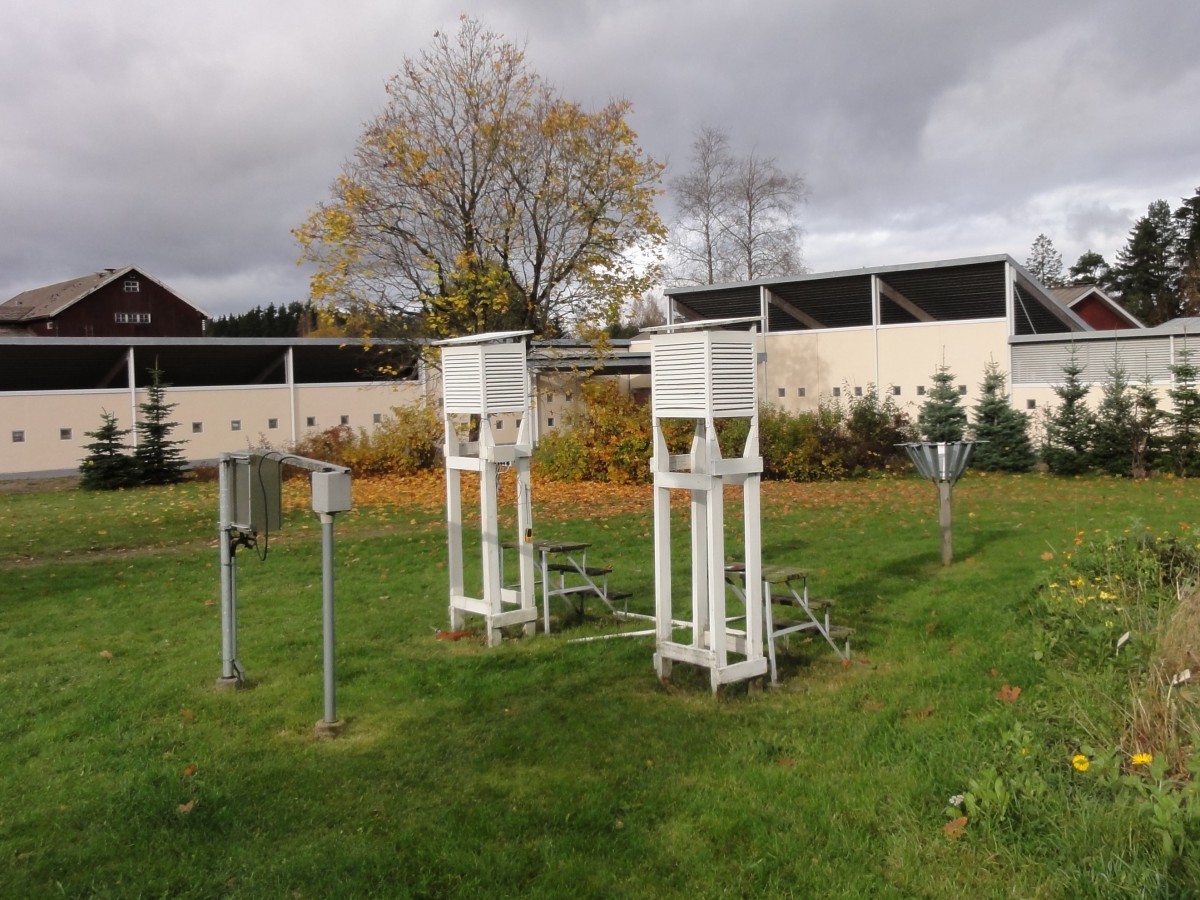
The adjoining picture displays a radiation shield previously used by the Finnish Meteorological Institute. The temperature and humidity sensors were placed inside the booth.
The temperature sensor should be situated at the height of approximately two metres, and at least 30 metres from buildings and watercourses. In addition, the sensor should not be placed closer to an obstacle than twice the height of the obstacle.
Wind direction and speed
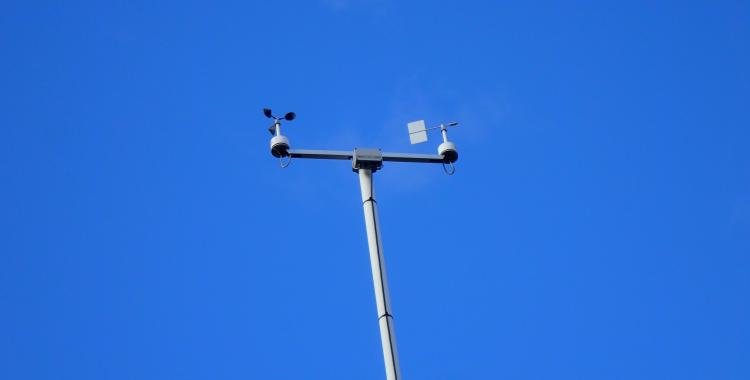
At the Finnish Meteorological Institute (FMI), wind direction and speed are primarily measured at an altitude of ten meters above any surrounding obstacles, but this may be difficult to accomplish at home. When situating the wind sensor, pay attention to changes in the observation environment (growing trees and bushes) and other obstacles in different measuring directions. The wind sensor should be placed in an open place, such as the roof of a building, with attention to the safety aspects. If the probe sensor is placed on a roof, it should be situated at least a few metres above the roof, so that turbulence from the eaves of the building will not disrupt the measurements.
When installing an anemometer, pay attention to the correct alignment of the sensor, so that the sensor will observe the wind directions correctly. The alignment mark in the anemometer shall be aligned with true north. If the alignment is done with GPS or a compass, the geomagnetic declination, meaning the angle between magnetic north and true north, shall be taken into account.
It is advisable to compare the results yielded by your private anemometer with the wind direction observations made at the closest FMI weather station. If the wind direction differs from the FMI observations with more than 30 degrees, it may be a good idea to check the alignment of your anemometer. When you are installing your anemometer, make sure that it is situated horizontally. If the probe does not stand straight, it will yield incorrect results.
The anemometer should be placed at an altitude of approximately ten meters above any surrounding obstacles. In addition, the probe should not be placed closer to an obstacle than ten times the height of the obstacle.
Atmospheric pressure
The pressure sensor should be situated indoors in a place where it is protected from draft, heat and sunshine. The temperature at the location should be as steady as possible. We recommend that you calibrate any pressure gauge you purchase for private use. The most convenient way of calibrating the gauge is to compare the atmospheric pressure values observed at the closest FMI weather stations and use them to assess the atmospheric pressure at your own measuring point.
Please note that the atmospheric pressures reported by the Finnish Meteorological Institute are arithmetically converted (reduced) to sea-level altitude. Therefore, you must assess the height at which your own pressure gauge stands from the sea level. In atmospheric pressure, a drop of 1 hPa indicates an elevation of eight metres. The comparisons should be made in optimal weather conditions, meaning high pressure, wind less than 3 m/s, and as steady temperatures as possible. The weather conditions can be checked, for example, from the observations made at the closest FMI weather stations. The atmospheric pressure should be adjusted to the correct level by altering the height of the measuring point on the instrument. The reduction process makes measurements done at weather stations located at different altitudes comparable with each other.
Precipitation and snow depth
Special attention should be paid to the location of the rain gauge, or pluviometer, and the snow sensor, as they require specific surroundings. Ideally, a pluviometer is placed in an open area surrounded by bushes. This is because some of the rainfall may miss the gauge at wind speeds as low as 2 m/s. If there is no natural shelter around the pluviometer, you can also build a wind protector around it. The wind protector slows down the airflow around the pluviometer opening, allowing rain to fall into the container.
The pluviometer shall be placed horizontally, even if the ground surface is tilted. When planning the location of the pluviometer, keep in mind that turbulent winds can cause the gauge to show lower precipitation levels than in reality, and splashes or water dripping into the container can increase the amount of precipitation from the actual levels.
In the wintertime, measuring precipitation with a tipping rain gauge (included in most weather station packages) is not possible, unless the instrument is heated. In the winter, precipitation can be measured with an accumulation rain gauge, where the accumulated snow is first melted and then measured.
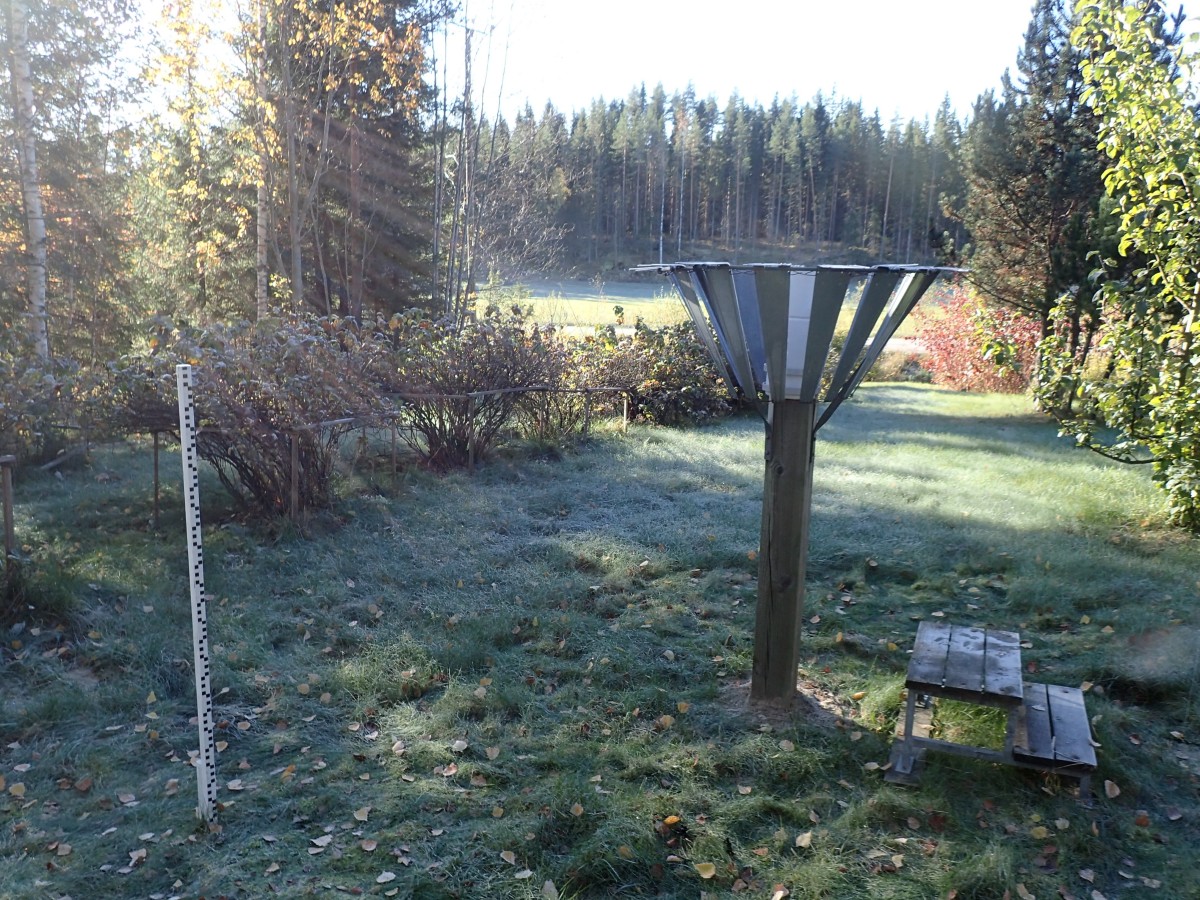
Snow depth can be measured with a stick with markings at one centimetre intervals.
The ideal measuring point would be a place where the wind has as little effect on the snowfall as possible. This can be achieved by, for example, planting a few relatively low-growing bushes near the measuring point. Furthermore, the place should not be too sheltered, either, as this will prevent the accumulation of natural snowfall. Such an overly sheltered location would be, for example, right next to a building, where snow drifts tend to form.
When you are measuring precipitation, keep in mind that there can be substantial local differences even within a small area. Therefore, the snow depth and precipitation levels observed at your private weather station are not directly comparable to the observations made at the nearest FMI weather stations, but they may be indicative. For example, rain showers in the summer can be quite local.
The pluviometer should be placed at a height of approximately 1.5 metres. In addition, the gauge should not be placed closer to an obstacle than twice the height of the obstacle.